
Coffee sticks in action.

I have neglected this blog and failed to take some pictures that I should. That said, here’s the state of the build today. Lots more coffee sticks have gone into the build
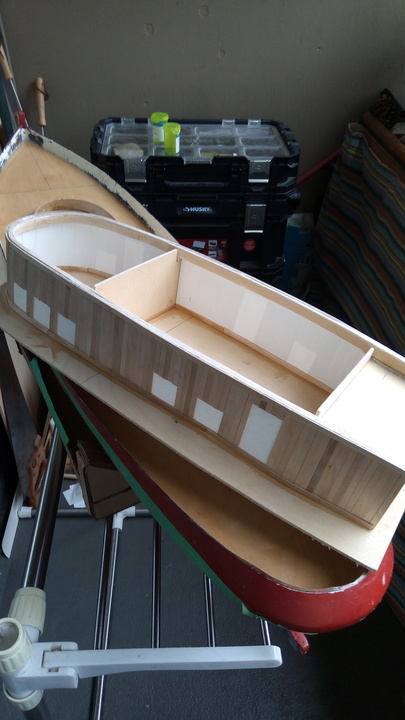
This picture shows the deckhouse upside down. The deckhouse bottom sides were first glued to the frame that was laminated around the coaming in Part 11, and then a skirting of coffee sticks glued on around the outside bottom edge. Once this was dry, I added the two internal bulkheads and the slightly raised rear winch deck. The winch deck is probably twice the scale height above the main deck, in order for it to fit over the coaming on the model.
With the bulkheads and winch deck in place, the top edge of the sides was held well enough for me to glue “skirting” coffee sticks around the top edge inside and out. And I then found I had a structure that was quite stiff enough to glue the upper deck onto, cranking the curve of the deck into the 1/8 inch ply with cord around a cross stick at the forward bulkhead. To glue it down, I paintbrushed epoxy into the corners both inside and out.
There are a couple of things to be corrected on the deckhouse as you see it, first the upper deck overlaps it too much at the stern, and then also it has ended up with the sides and winch deck just short of their proper overlap of the coaming at the stern. Bodging will be required, but it is bodgeable. Also, as I built this, I started thinking that the model mechanics and gubbins will all easily go in below deck level, and there is a possibility of making my life still more difficult by adding internal detail to both the deck and wheel houses. But if I were to leave the deckhouse doors open in order to see the internals, there would be a fairly glaring non-scale sill thickness. That’s to get over the deckhouse bottom frame and coaming.
For the wheelhouse and Captain’s cabin, leaving open the possibility of internal detail is still more attractive, so I am thinking that their roofs may be removable. And have tried to build the sides with no internal structure that would prevent that.
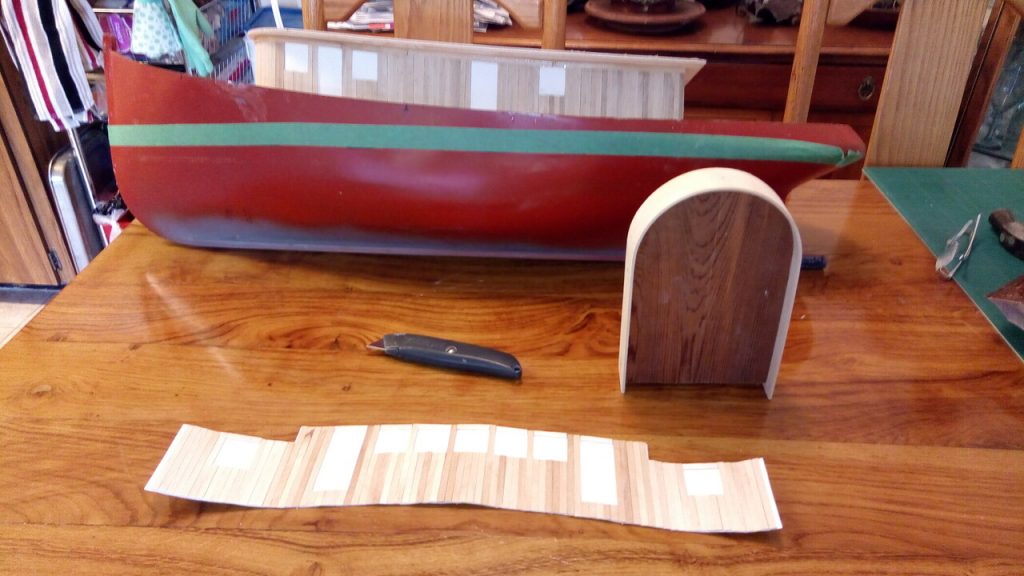
I was very impressed by how the stiff and rigid the deckhouse top edge was once the “skirting” coffee sticks were laminated on. I needed a mould on which to laminate the wheelhouse, because I didn’t have the stiff laminated frame moulded from the coaming which I used for the deckhouse. So the picture above shows the deckhouse sides of coffee sticks stuck to Bristol board and the mould I made from a piece of 3/4 inch cedar plank and a length of 1/8 inch ply, 1 1/2 inches wide. The ply was soaked in hot water in the bath and then just nailed onto the cedar.

The actual laminating operation was a bit of a nightmare. The problem was the heavy curvature with the wheelhouse windows at the top edge. I had added top edges to the windows with short pieces of coffee stick with the grain horizontal, and they were really resistant to bending. So what you are looking at above is 4 layers at once. There’s horizontal coffee stick on the inside, then bristol board, then the short coffee sticks at the window tops, and then the top “skirting coffee stick on the outside. The only way I got it done was a little at a time. The next picture shows the same setup from the inside.

So starting at the front centre, I got about 45 degrees each side glued and clamped. This I left to dry before taking off the outside clamps and feeding in the next sections of inside and outside “skirting”. It worked, but there was a lot of gluey fingers and bad language present.
Finally:-


The first picture shows the “springback” of the lamination as it came off the mould, I was quite pleased with how little it was. It will press in easily to a straight back position and the bulkhead and back wall will be simple to install. There’s going to be a bit of an interesting floor to put into the wheelhouse, because it should be horizontal instead of following the sheer, but sufficient unto the day!