
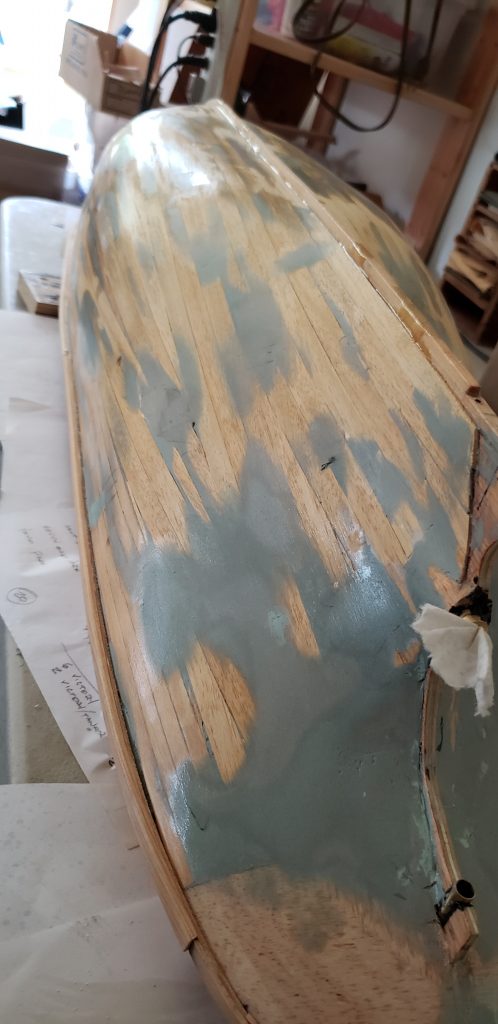
Well, the hull should be watertight.. I don’t see any major holes. Anyhow, that’s why there’s pumps!!.
I put a coat of clear epoxy on the inside of the hull for two reasons: it stiffens the planks for fairing/sanding the outside and; it waterproofs the inside of the hull against leaks and damage. Inside the hull also got a coat of grey primer. I used automotive Bondo as the fairing compound to cover the biggest errors and omissions – Bondo adheres well to wood and sands easily. It does have short pot life, especially in small quantities where mix ratio is sensitive! And it stinks.
The rubbing strake was added along the sheer line, where deck and hull side meet. This is two layers of 1/8 x 1/4 wood – much easier than trying to bend 1/4 square stock. Then, the whole thing was brushed with gloss polyurethane, which soaks into the wood for waterproofing. Thanks to Ken Lockley for that idea. A bit of fine sanding with 220 grit, then a coat of Tremclad grey primer.
I marked the waterline at the stem and rudder post, and at two places on each side, using the rubbing strake for reference. Masking tape applied by eye as straight as possible, and then two coats of Tremclad red oxide for bottom paint. I masked the upper deck and the waterline again, then applied two coats of Tremclad flat black to the upper hull and bulwarks.
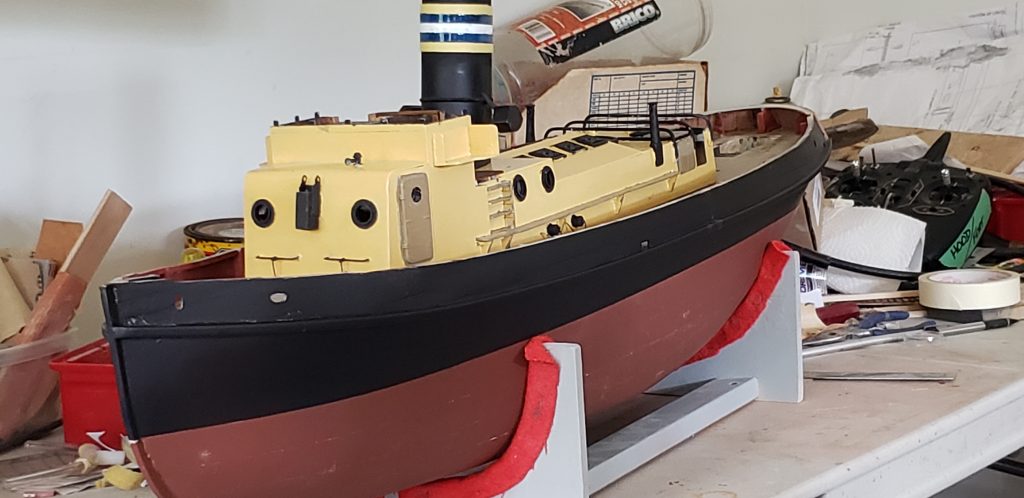
The deck is a “dark buff”, which is Humbrol “light buff” with some extra brown mixed in. The superstructure is Humbrol light buff.
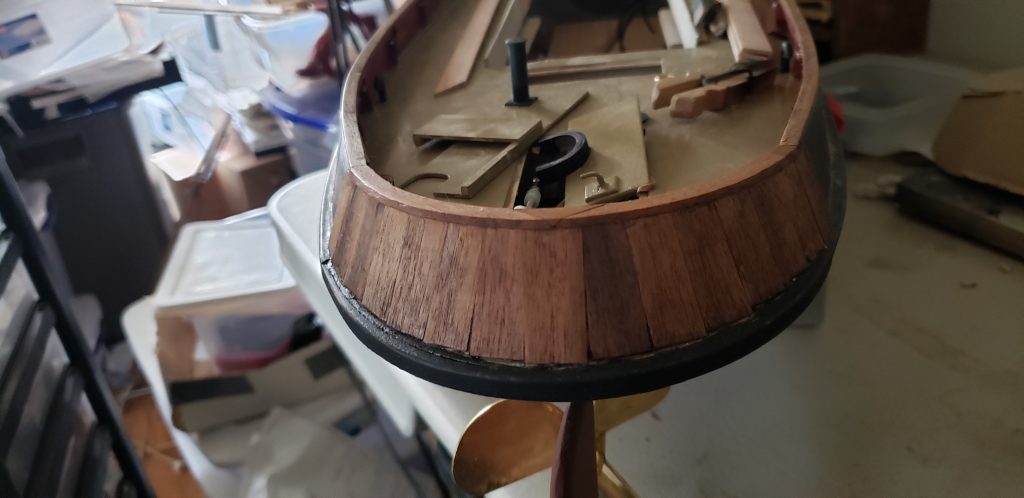
Mahogany cap rails were bent on, stained with a “red mahogany” stain from Minwax. The stern planking on the bulwarks was also fitted and stained.
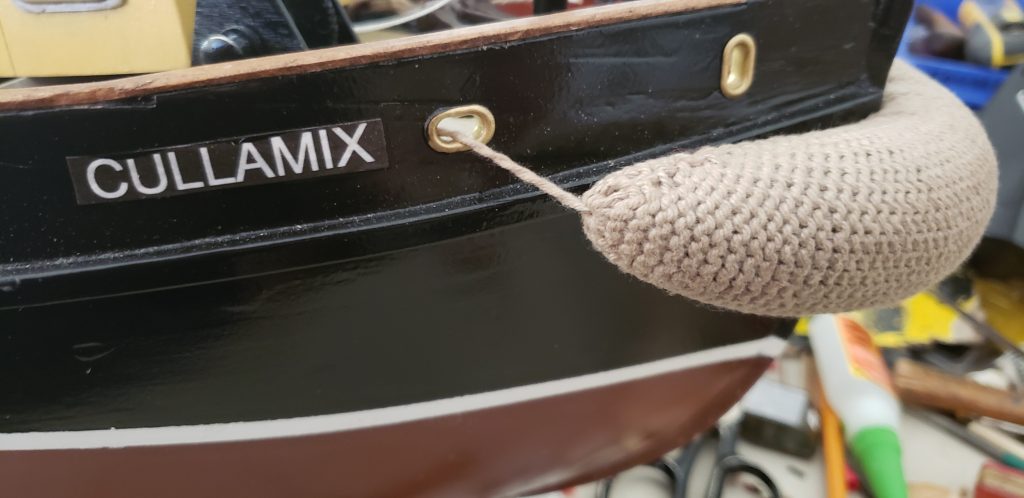
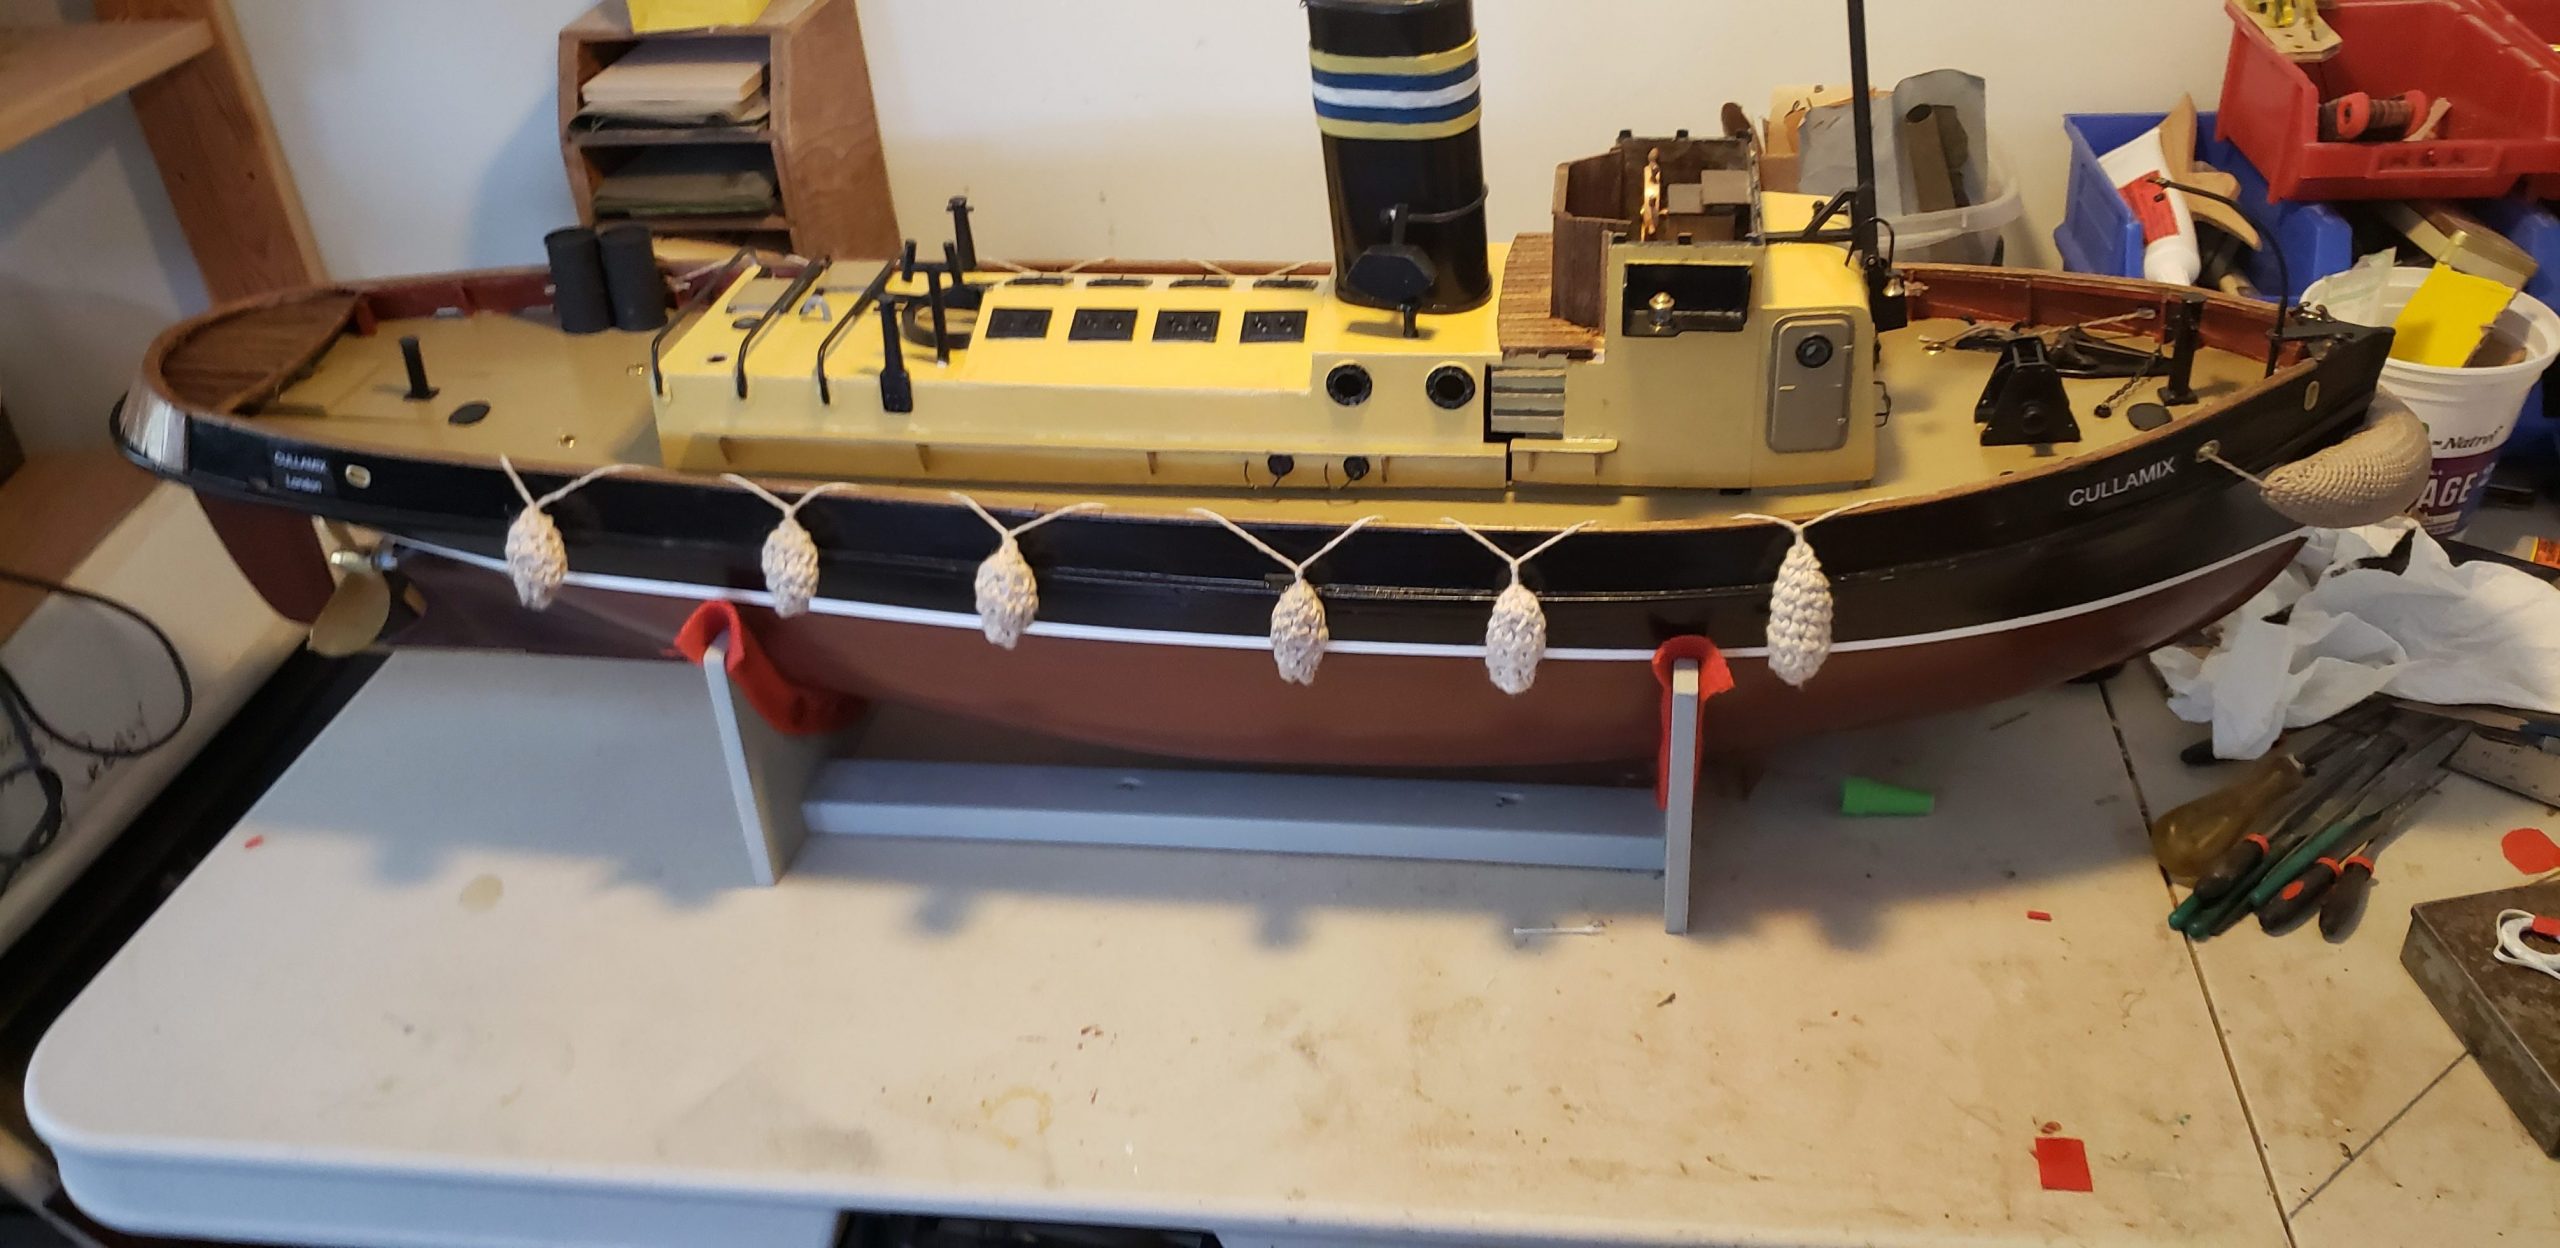
A white boot top was added along the waterline, along with name panels on the bulwarks. These are just text boxes, filled with black using white text. Stuck on with white glue, and will be topped with polyurethane spray (several coats!) And she’s now starting to look like a smart little tug.


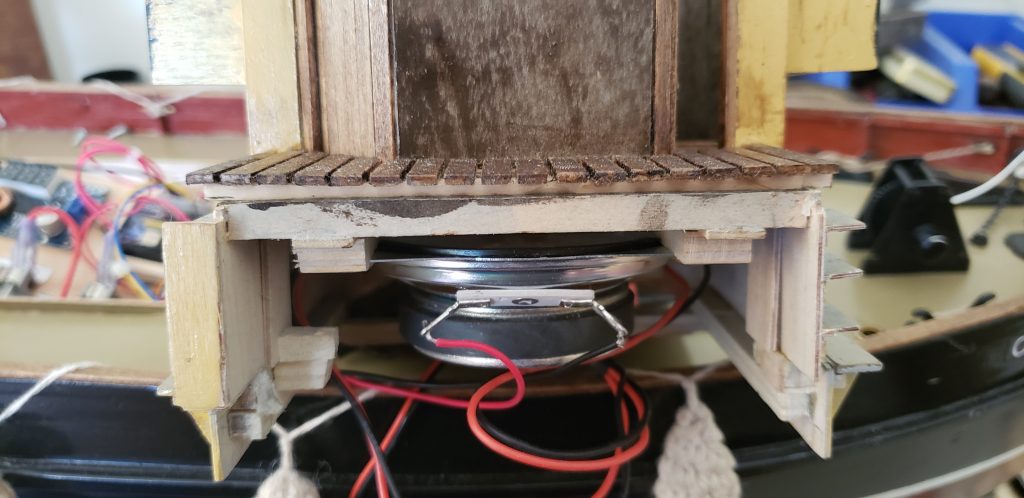
So now the neat stuff begins. I’ve already laid out the internal components and now I get to install them – hopefully get them to work. The speaker is installed under the gratings in the wheelhouse. I was hoping to install a linkage between the rudder and ship’s wheel, with a chain & cable system driven by the rudder servo (as in the real ship) so that a tiller arm on the rudder post would drive the wheel. I might leave this idea for a while, mostly because I can see some issues with accessing the wheel, while the speaker is close under the wheelhouse deck grating.
Two 6v gel cell batteries under the wheelhouse, with a bit of wooden bracing to keep them in place. The batteries will be connected in series to give 12v for main power. Doing it this way – as opposed to single 12v battery – gives more options for location and spacing. In theory, you could have the batteries located at each end of the boat for weight or other considerations.
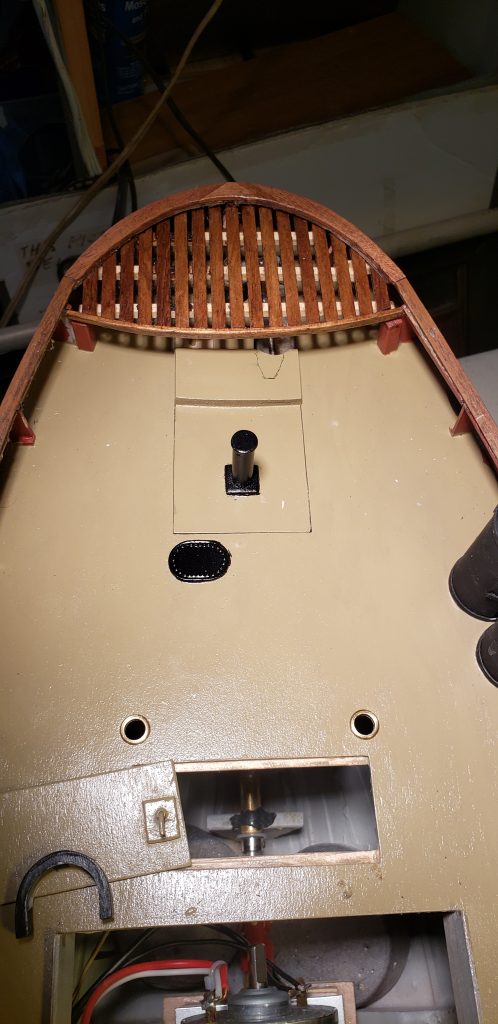
Speaking of weight, a float test at this point showed that at least 20 lb would be needed to get near the waterline. I cast lead pucks in an old muffin tin – each about 1.5 lb. They are thin enough to fit under the floorboard (1/2 to 5/8″). You can see two of them behind the motor; the rest are under the floorboards between the frames. I put on a bit of two-sided tape so they won;t shift around. There’s 10 of them (15 – 20 lbs) and room for more once we hit the water.
After installing the floorboard/engine mount (see previous posts) I connected a lot of wires and the shaft coupler. Being a very smart fellow (I’m old – it comes with age!!) I realized when I put the decks in place that the shaft coupler would be impossible to reach behind the motor, so I built a little removable panel in the after deck, right over the coupler.

The speaker fits nicely under the wheelhouse.

Rudder linkage works as planned with a another pop out panel in the after deck. The rudder post extends above deck because a) there’s not a lot of room under the deck and b) I was thinking of installing a cable & chain steering system to connect a tiller arm to the wheel, as in the original ship and all above deck. Maybe next winter.

This model has very little fancy work on the upper decks, not even a rowboat. Some of the fittings are from Cornwall Models, some from Harbour Models, and some I made. The woven bumpers look good.

Only a few more odds and ends to add, and then we’ll see if it works. The Mtroniks sound system is giving trouble – only works for engine start and horn, not working off throttle.
The smoke generator works fine – I’m using a 6v Harbour Models unit that I stole from the semi-retired HMS Hood. Its wired to a Turnigy inline switch, so I can turn it on or off, instead of wiring it to the speed control.
The motor & propeller work nicely – no vibration and little noise. I think we will have some serious pulling power, so a heavy scow might be the next build. I might add a canvas top to the wheelhouse at some point, maybe next winter when I tackle the steering system.
Otherwise, I think we’re done!
Very, very nice Mike. And a tribute to your persistence.
Edward.
Thanks for documenting this build, Mike. Very informative.