
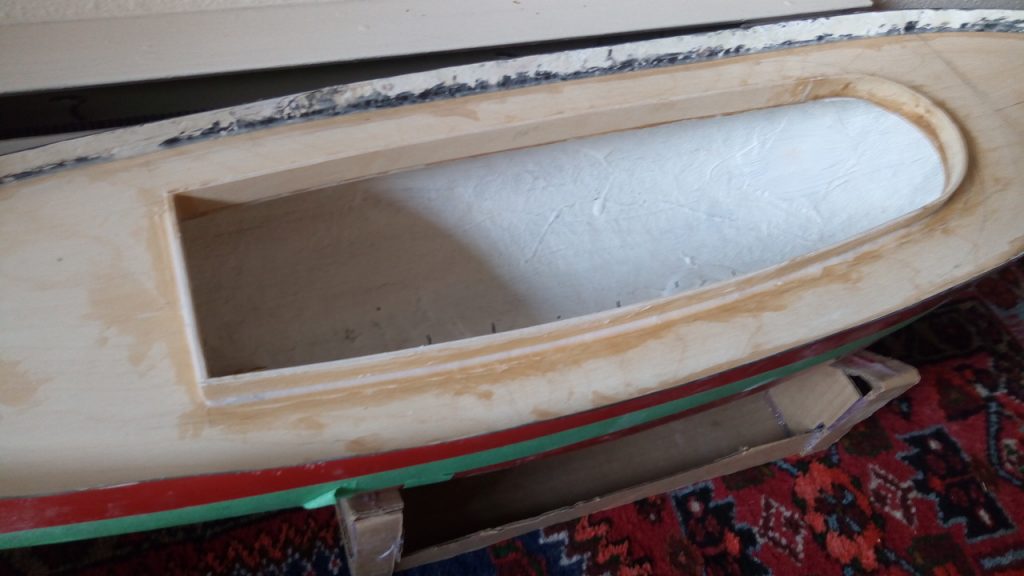
The Coaming
I think I mentioned earlier in this series that I want the superstructure to fit over a coaming around the access hatch. This so that water splashing on the deck cannot readily get into the hull. This time I first glued a 3/8 inch (10 mm) strip of plywood around the underside of the hatch hole leaving a 1/8 inch (3.5mm) overlap as a ledge on which to glue in a vertical strip. The vertical strip is in four pieces, a flat straight piece at the stern end, two curved sides that are curved vertically to match the sheer line, and horizontally to follow the beam line, and then a tightly curved semi-circle at the bow.
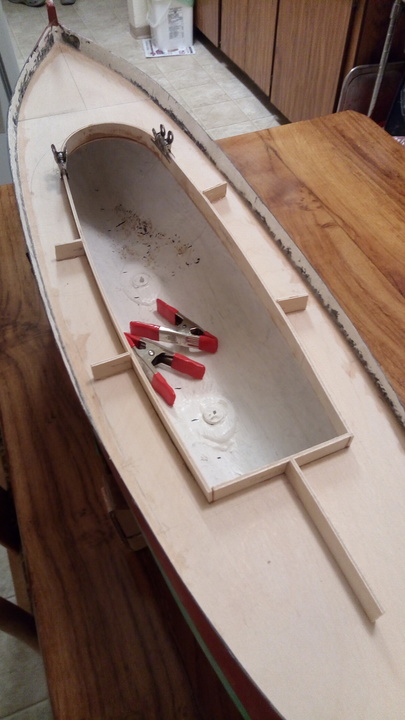
The first piece in was the bow. To do this I cut a 3/4 inch (16 mm) strip of 1/8 inch ply with the outside grain running across the width, (more flexible). I boiled this strip for 15 minutes and then wrapped it around a large can of tomatoes, holding it in with string. I left the lot in a very low oven for two hours to dry so it took a set close to the right radius to fit. I found it would hold in place just using the two spring clamps to jam the back edges forward and epoxied it in.
Next was the straight back piece. The straight piece leading from it towards the stern was just to hold it in place while the epoxy dried. I hot melt glued this to the stern piece of the coaming, then mixed and placed the epoxy, and then put two dabs of hot melt on the bottom of the holding piece to hold the piece while the glue dried.
I used the same system, with shorter tabs, to place and hold the side pieces. It worked pretty well, I was able to cut and peel away the hot melt quite cleanly on the side tabs. There was a little more trouble with the stern tab hot melt patches, a few of the wood fibres coming up with them, but nothing serious on a deck that’s going to be painted.
Twenty four hours later I added a thin filet of thickened epoxy to the outside bottom corner all the way round to increase the coaming’s strength and to make doubly sure of its seal. Once that is cured off I will sand it all and coat both the deck and the coaming with clear epoxy to complete the water-proofing.
The other thing that happened for me was a sudden wave of childhood nostalgia. I was looking around the internet for more on the issue of the windows in the Master’s wheelhouse, and found a U-tube video tour of the Master’s interior. This actually shows, very briefly, a leather strap, with belt holes, at the inside base of the window. Riding trains as a boy in England, the older carriage compartments on local trains (no corridor) had doors on either side with a sash window and a leather strap to raise and lower the sash. The leather was fastened to the sash itself at the bottom of the frame and the holes were pulled over a brass button on the inside of the door to adjust the sash height.
A boy and his two sisters could have a wonderful row over who controlled the strap and could let the sash down with a big thump, and be yelled at by parents for leaning out of the window, letting in the smoke and the cold, risking getting thumped by a tree branch or what have you, feeling sick and needing air, getting wet from the rain and smuts in your eyes. Of course you would get separated by the parents into the corners and told to sit still, leading to the inevitable “She’s looking out of my window! It’s not fair!” Train journeys were Great!
But that solves the issue of moveable sashes in the Master’s wheelhouse. Did they have those windows on Canadian trains?